There Wasn’t Enough Room to Swing a Cat
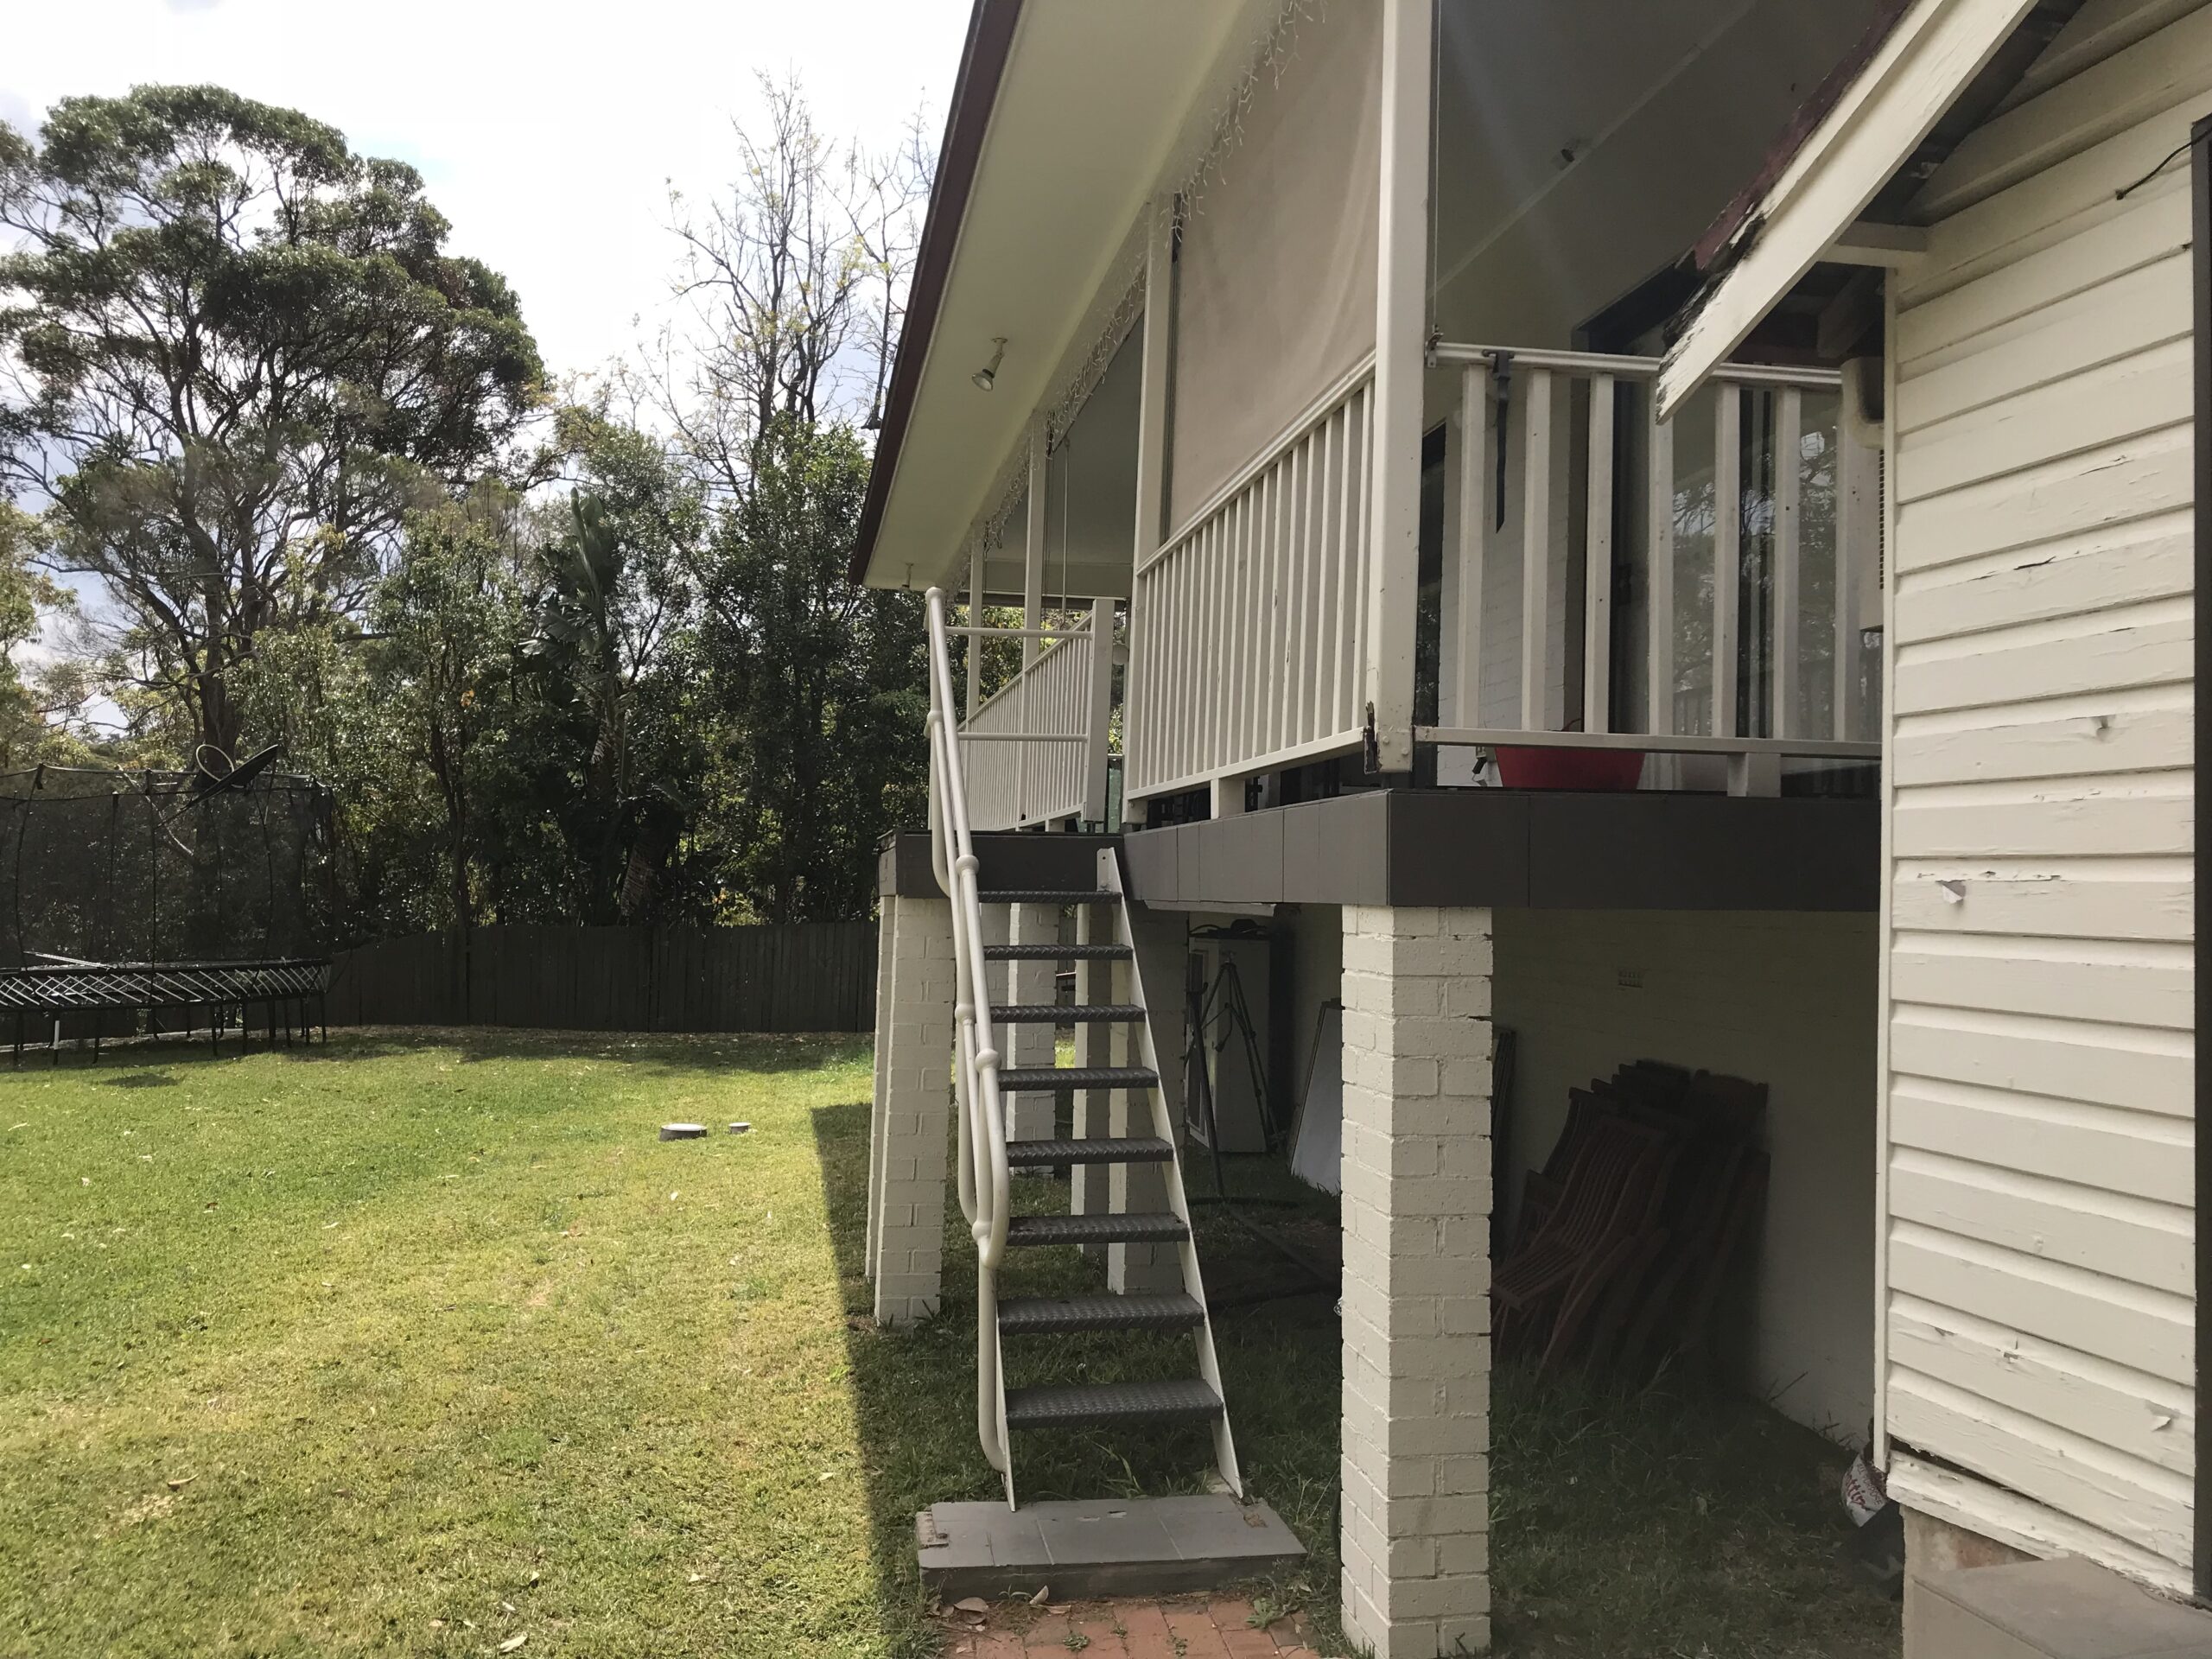
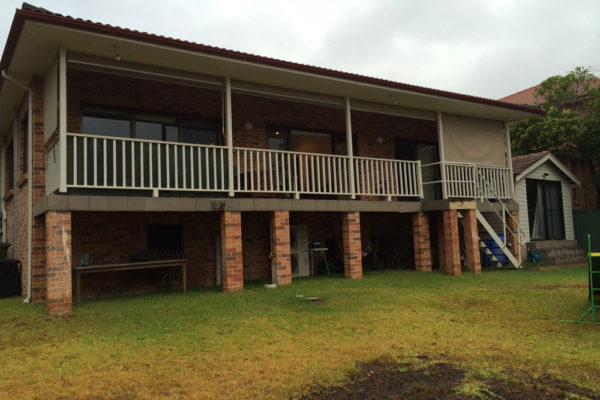
At this home in West Pymble, in Sydney’s leafy but bushfire zoned Northern Suburbs you would walk out the back sliding doors into a dated, dark, narrow space. This in turn led to a set of steep, rusty old stairs that you were worried that you would fall through halfway down.
It was a bit of a nothing’ space. An area that you would just pass through or wouldn’t even think about.
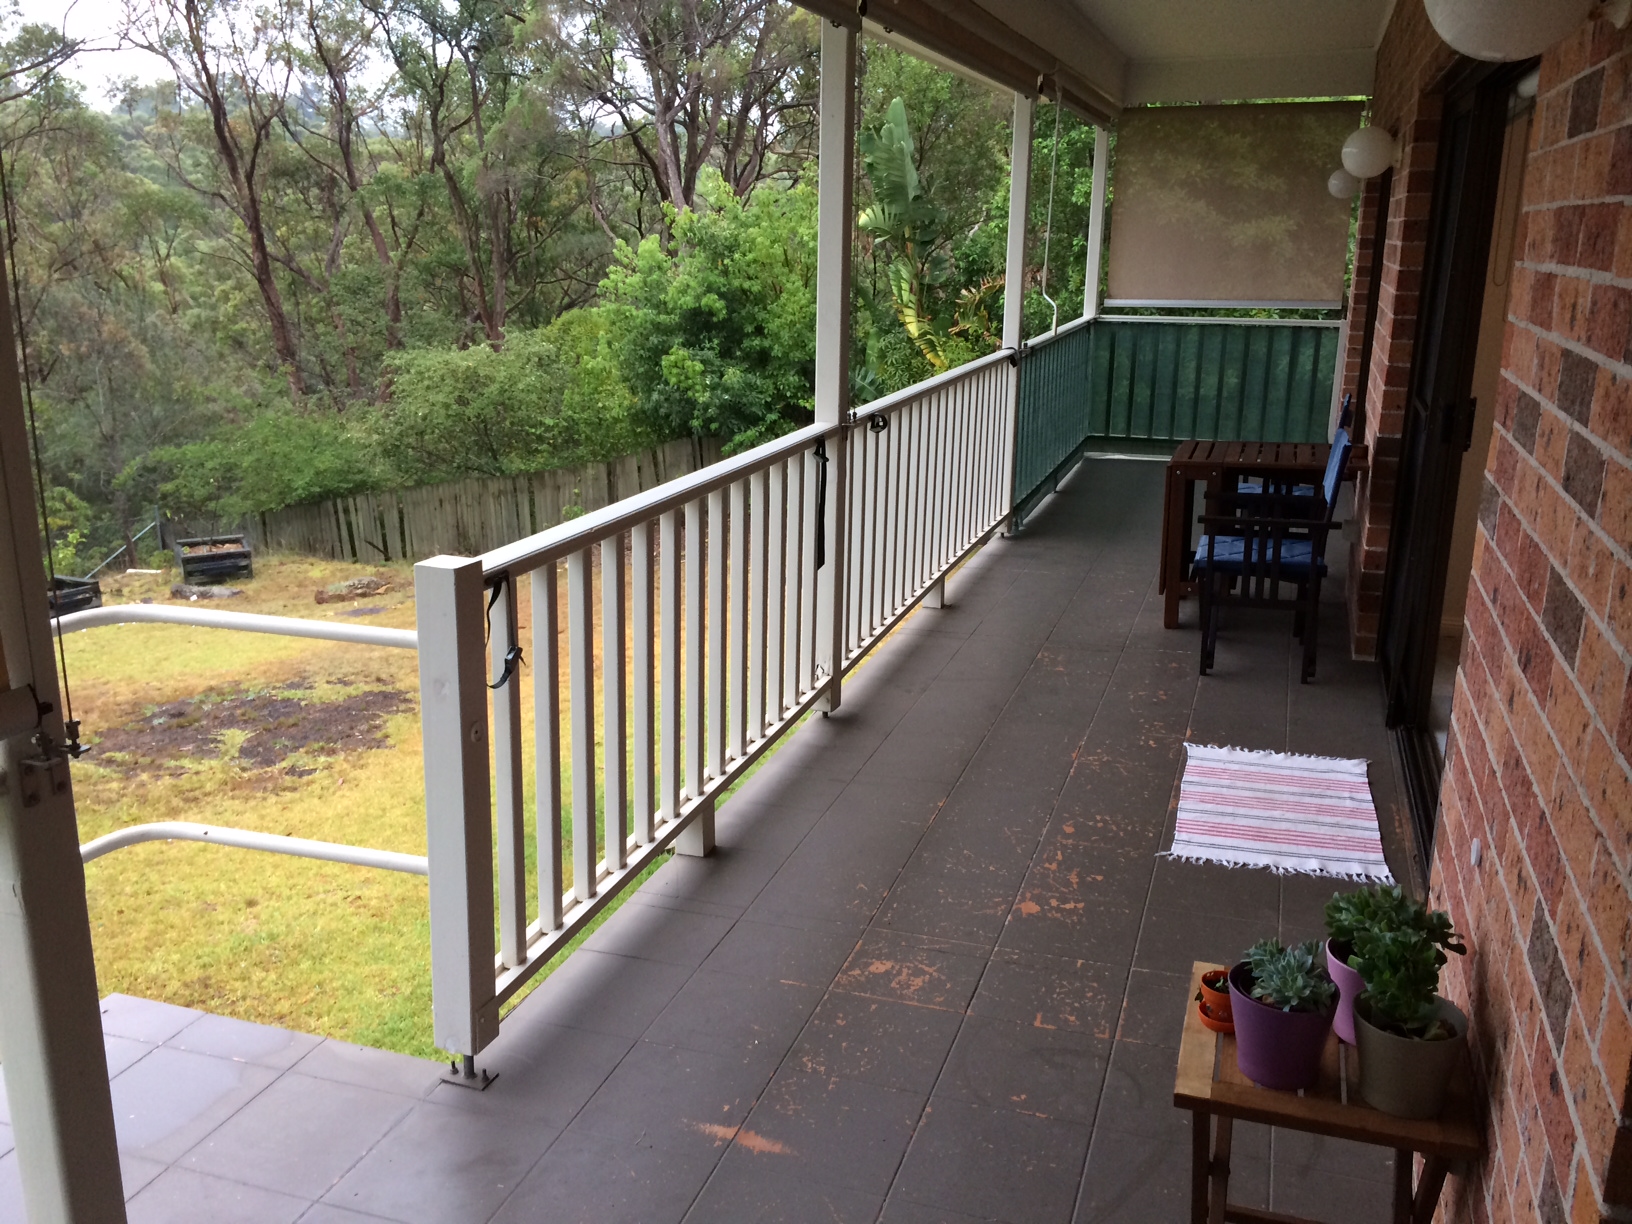
There was no ‘destination’ – why were you going outside? It was simply used as a thoroughfare to get from point A to B & point B was nothing more than a clothes line.
More importantly there was no ‘flow’ between the inside & out. There was no connection from the inside – out. No where to put any size of an outdoor table setting or BBQ/outdoor cooking facility.
The area was dated & uninspiring – you didn’t & even couldn’t go out there to enjoy yourself or bring your friends & family together.
Over time as the property owners, Craig & Emma’s thoughts grew about how they could create something, they then faced the challenge of building within the highest level bushfire zone (BAL-FZ), which then created its own unique challenges.
A handful of builders & landscapers visited, but no one could bring all of the strings together & tick the boxes from design, bushfire compliance, local council & then full construction.
Frustration began to creep in for the owners Craig & Emma, where they didn’t see a way through the maze of bushfire & council requirements – but firstly they couldn’t seem to get any rhythm by getting a design set that they felt comfortable with.
Desiging the Deck & Patio Cover…
In our Design Consultation with Craig & Emma we listened to understand what type of deck & patio cover construction they were looking for that would work for their family.
Did they have inspiration from a magazine that they wanted to replicate for their home?
Or were they looking to create a simple, small oasis for their home?
They had a couple of main requests that they were looking to include into the new alfresco living space:
To create space
To be able to have multiple outdoor living areas. A space for a formal outdoor dining table, but also a secondary space which is more casual – a space where they could just sit to read the Sunday paper or enjoy a cup of tea.
Get the flow…
Emma was looking to provide a seamless connection from the inside to the new outdoors.
Our initial Design Consultation is an informal chat with our clients at their home where we talk through design options – what ‘could’ work here, or what would work there. Understand the site limitations, develop a floor space solution etc.
From which we can then go away to review not only Local Council requirements, but other areas such as the bushfire conditions, engineering specifications & the like so we can then present our tailored solution to our clients.
How we overcame a hurdle
If you didn’t think that the Bushfire Flame Zone rating wasn’t enough, there was one more issue we had to climb over.
There was an easement running right through & directly under the area where we were looking to build.
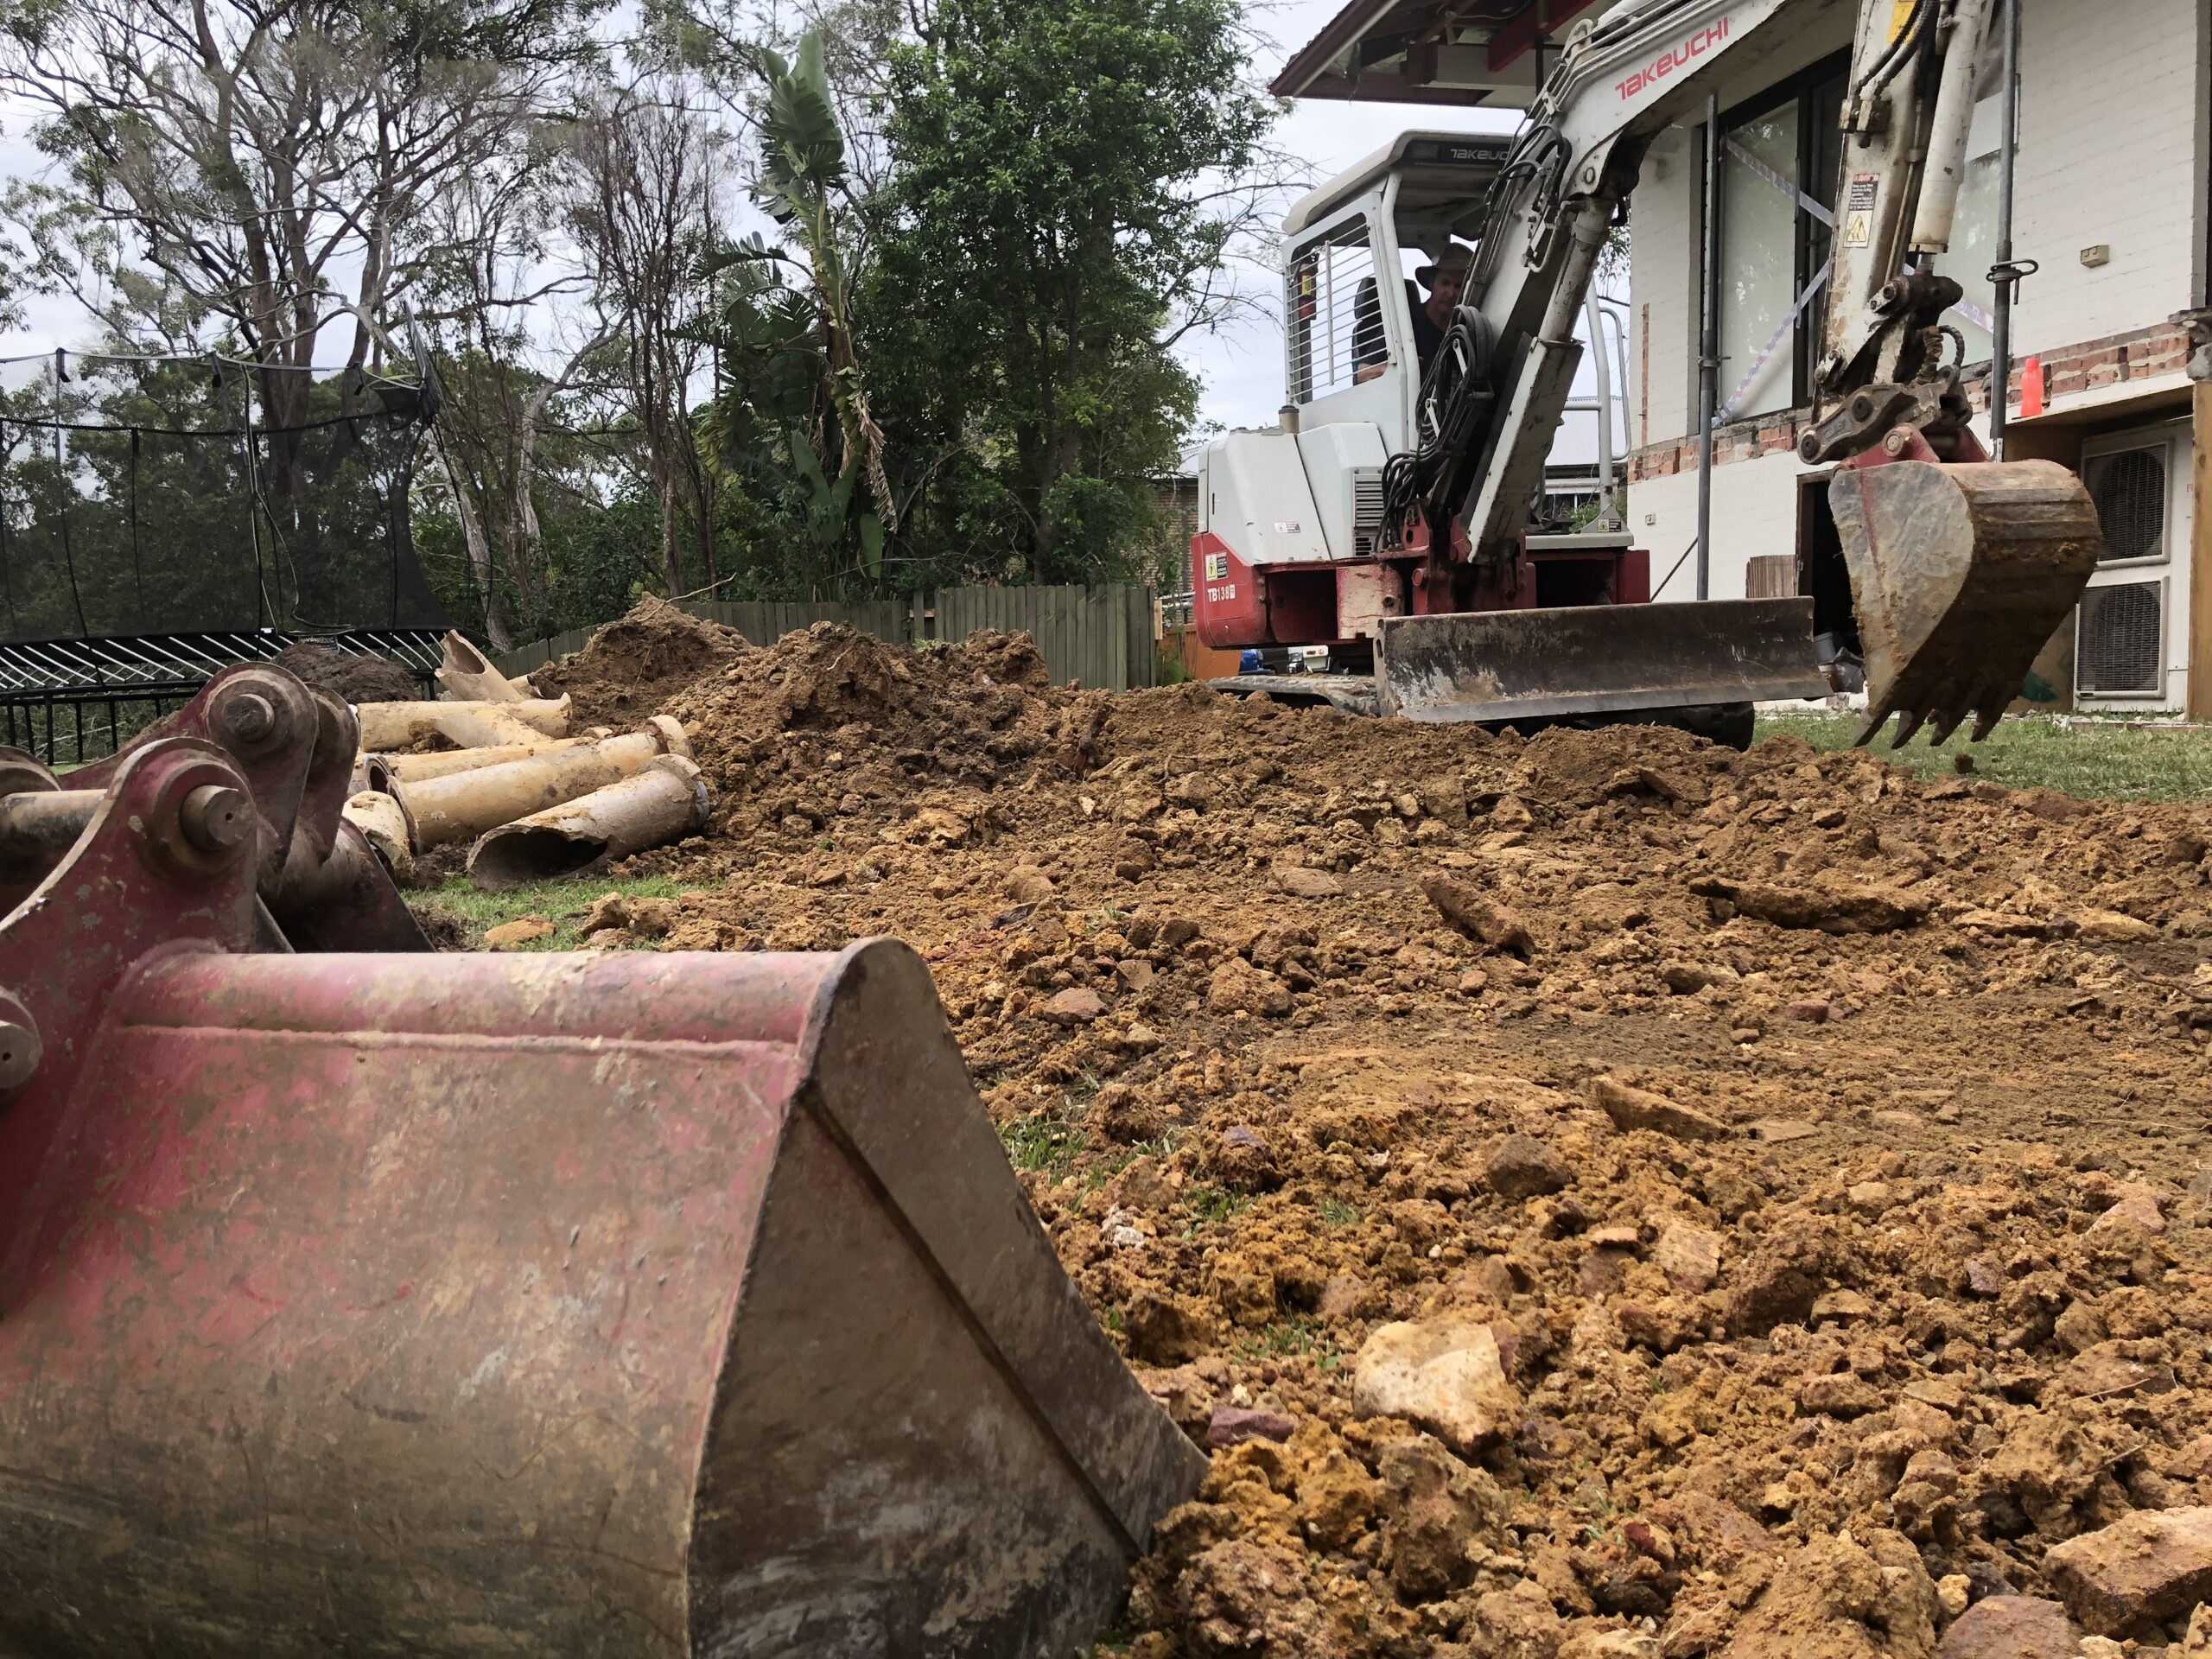
Obtaining Sydney Water approval is a condition of consent for all our works & having an easement impact one of our outdoor rooms is something that comes up a handful of times each year.
So what does this mean & how does it impact you when you are designing your deck & patio cover?
Unfortunately it means more paperwork, time, people & therefore cost. This can get all a little overwhelming if you haven’t faced it before but there is a process involved & some design parameters that need to be followed.
Generally speaking the deck piers need to be designed around the easement & an engineer needs to create concrete footings around this piping. Following which a few people need to sign off on the documents to get the bit of paper that enables us to start the construction process.
In this situation, we designed our floor framing & piers/footings to suit the requirements of the easement ‘zone of influence’. We then excavated the existing piping along our construction zone & encased the pipe work (encasing is where the pipe is covered in concrete to provide additional protection).
Working around, near or over existing easements do carry additional costs as further planning, drafting, engineering & then excavation is required.
”Tip...
Understand your properties limitations & requirements early,
So you can design around these correctly & don’t get any nasty surprises just when you think you are about to start
How we created the Outdoor Living Room
Even taking into consideration the easement detail running through the backyard, we were still fortunate enough to be able to have plenty of room to play around with different floor space sizes & really create an area that had plenty of room.
”Tip...
If you have the ability to even grow your floor space by even 30cm - take it.
Floor space is your ‘real estate’.
It gives you the ability to create the flow.
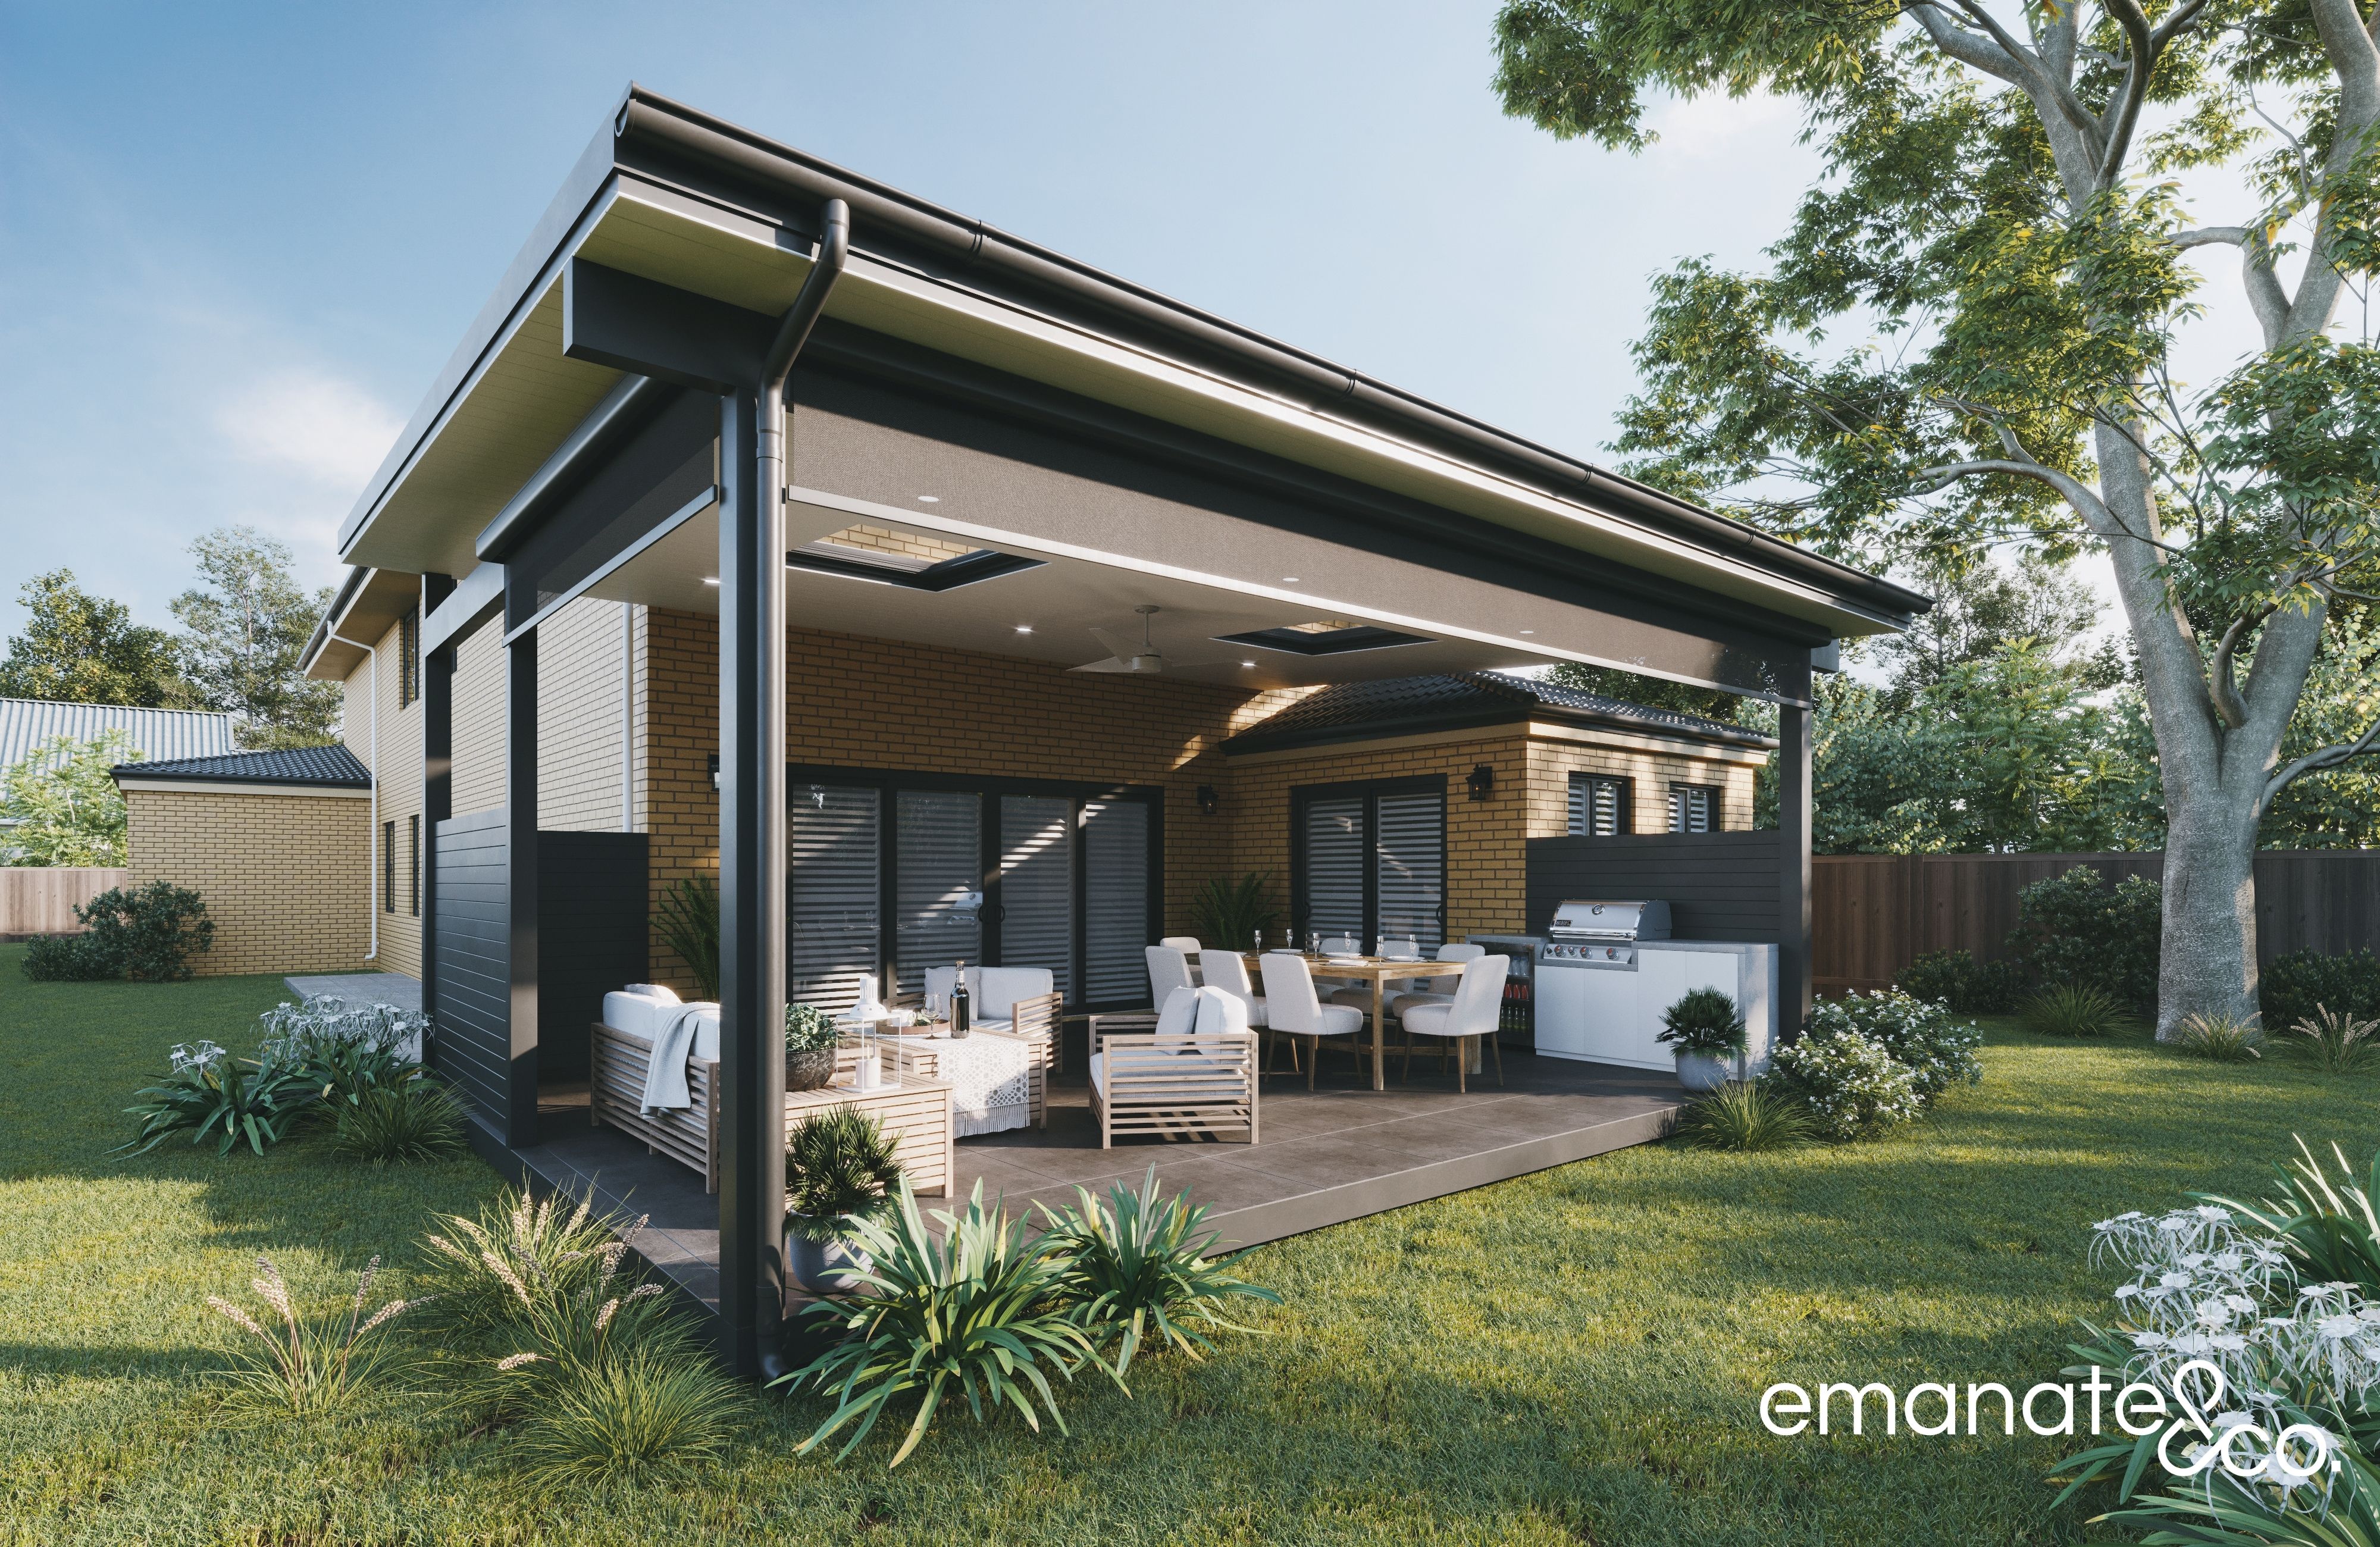
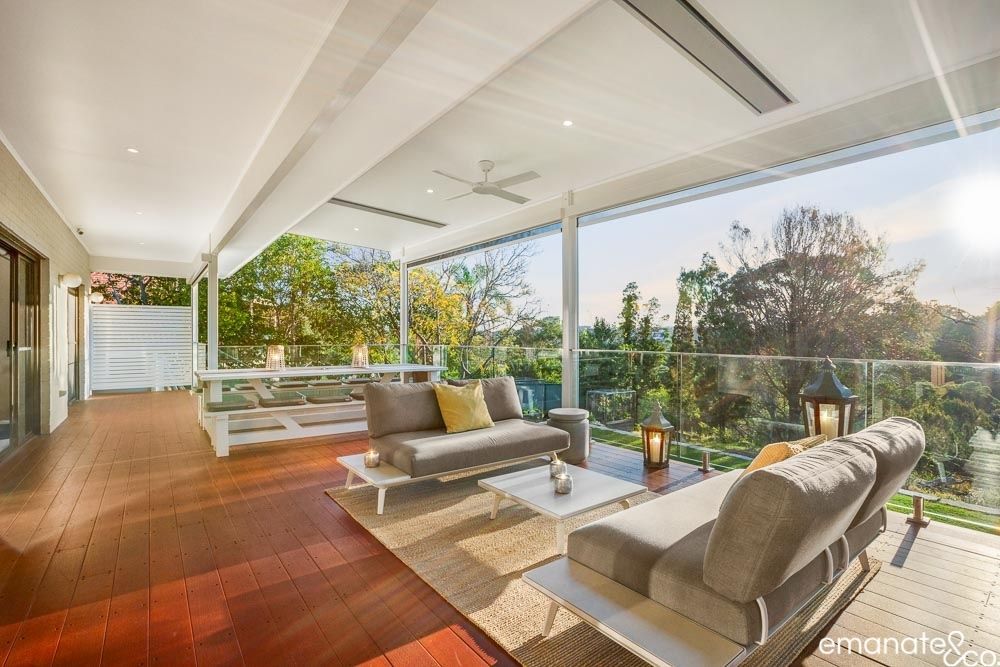
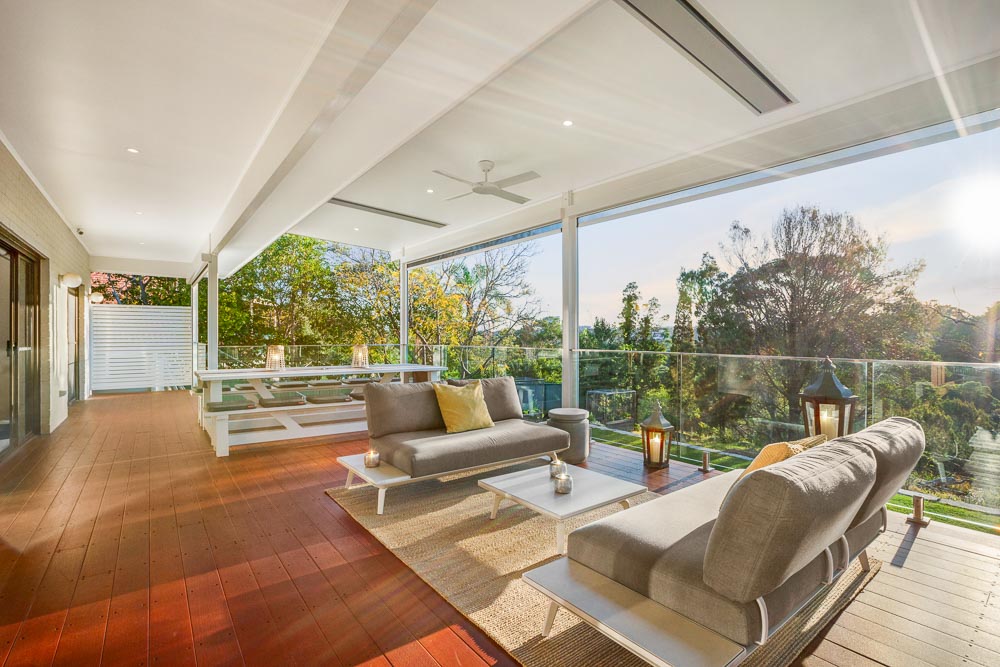
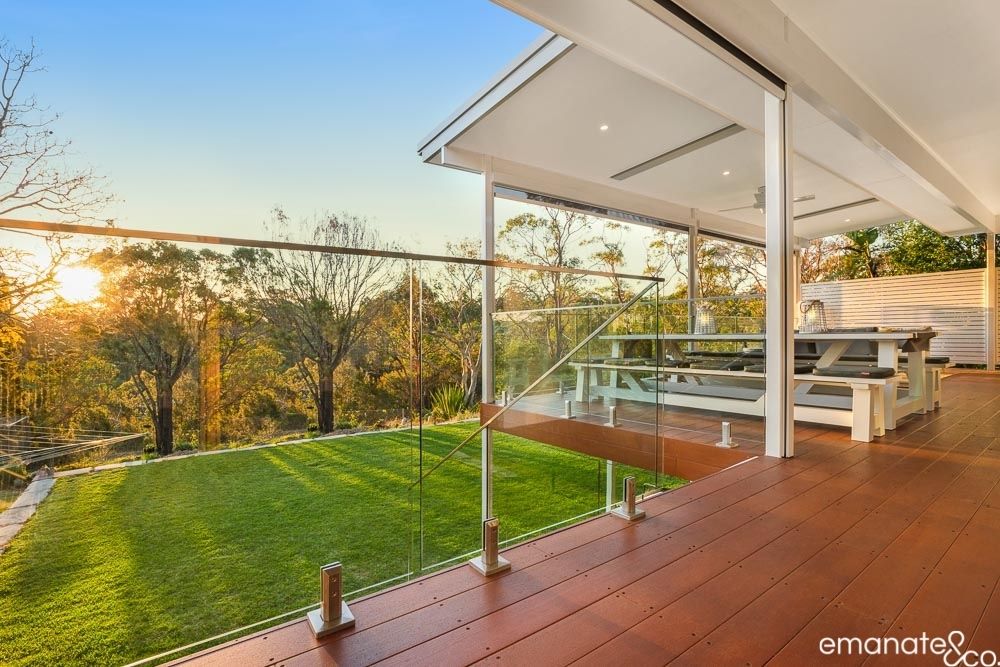
The focus was to create a single main floor space that was the focal point to the rear of their home.
A space where it could be more formal outdoor dining or a casual cup of coffee with friends.
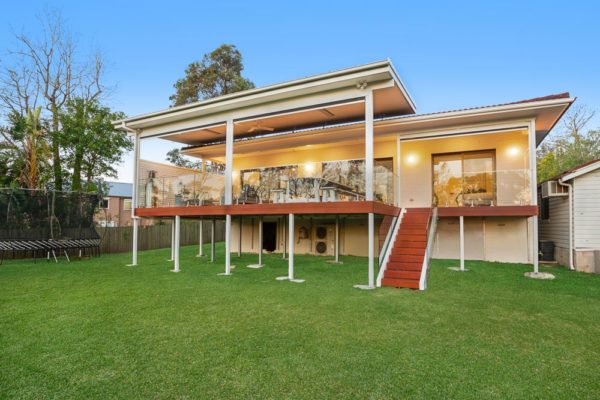
We extended out from the existing narrow balcony another 3180mm, to create a single projection of 5000mm. In terms of width, we worked around the existing starting & finishing points on the rear of the house to create a total floor width of 8083mm.
Overall this works out to be a main floor space of just over 40 mtr sq (not allowing for the small side area), which is a great sized spot to have two distinct outdoor entertaining spaces. 1) Formal sit down dining & 2) casual.
Flow:
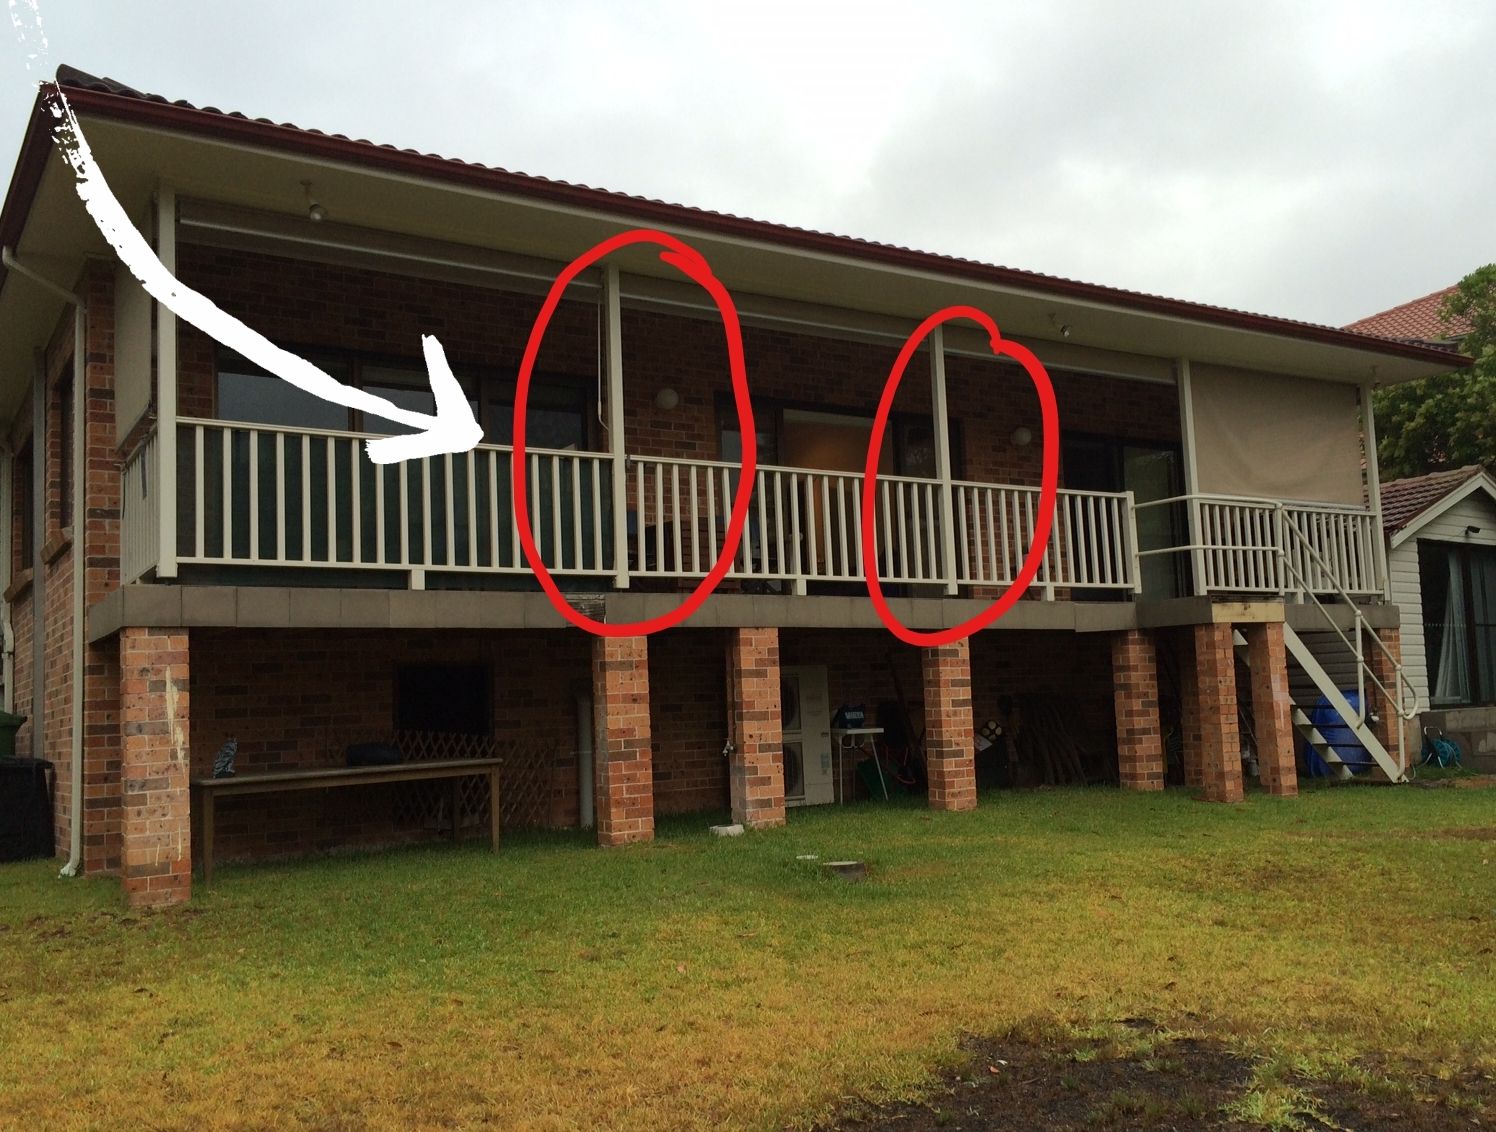
To get the best “flow” out into the main floor space we had a number of the existing posts which were smack bang, right in the way. This was a bold move, but we designed a structural beam to be craned into the existing house roof which meant that we could remove some of these existing posts & really open up the space from the exisitng rear sliding doors out into the new Outdoor Room.
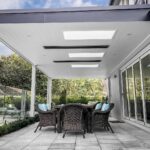
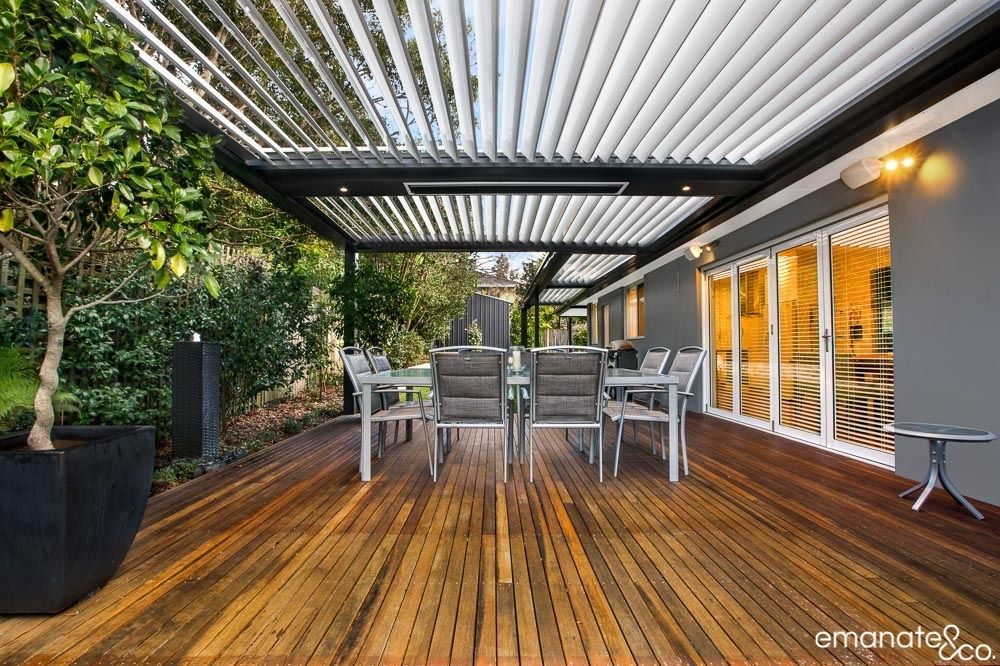
Patio Cover Design
We created height to the area by simply overlapping the new roof over the existing rear house roof line.
This enabled us to keep the design simple, with a skillion design, falling to the rear boundary, but still getting the air flow & head height that works well with what can sometimes be known as a ‘fly over’ patio cover roof design.
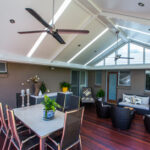
Continuing on with the ‘flow’ theme, we lined the ceiling with a fiber cement sheet that we then set all of the joints & painted to give that real indoor feel to the area. So the inside continued on….but now outside.
The height looking out was also a key.
The block had a beautiful bushland view from the rear that we didn’t want to impede. So by keeping the outside framing relatively high, you still got to pick up the afternoon sunsets behind the tree foliage.
Project Specifications:
Approval Process:
- Drafting of plans
- Town Planning
- Sydney Water approval & easement encasement
- Engineering
- DA lodgement & liaison with Local Ku-ring gai Council
- Construction Certificate process with PCA
- PCA inspections
- Occupation Certificate
Deck External Flooring:
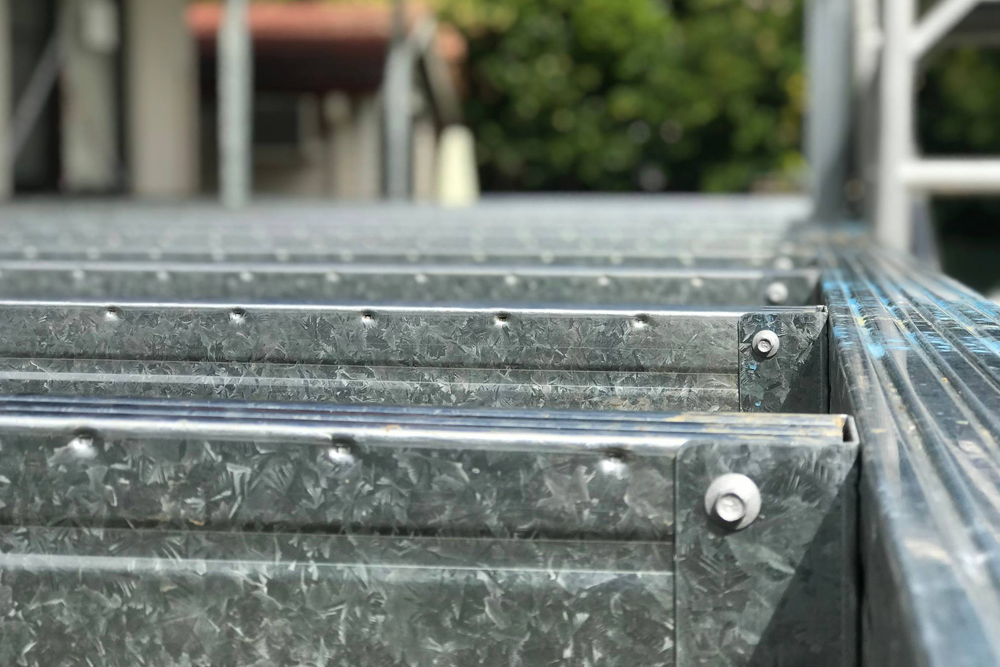
- Steel deck floor framing “Colorspan Exterior Flooring System”
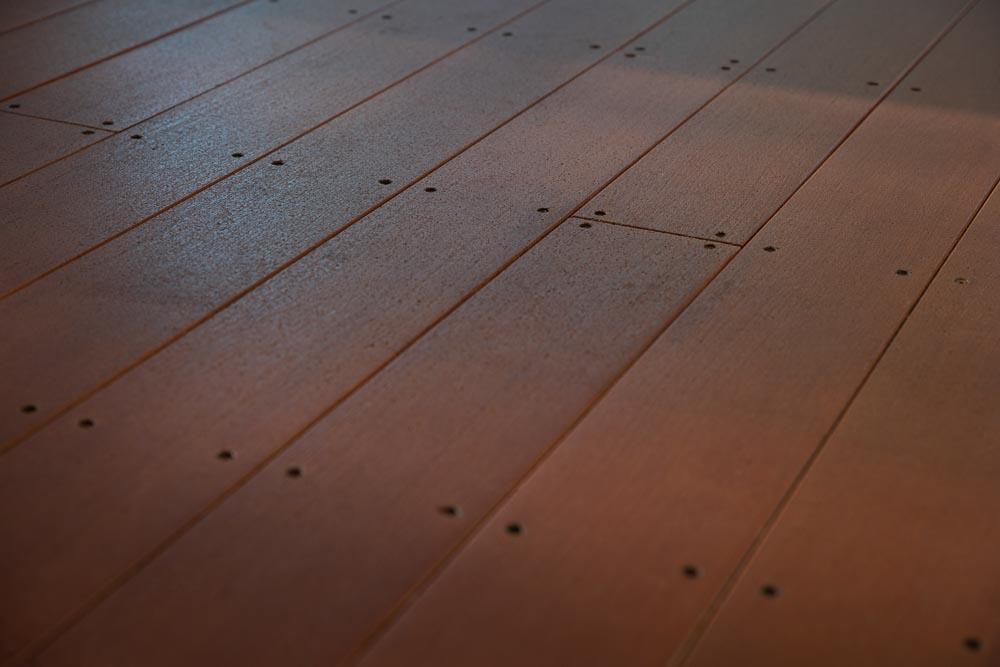
Steel framed joist & bearer deck framing system with galvanised steel piers into concrete footings - ‘Inex’ timber look composite decking (Note: Unfortunately this product is no longer available).
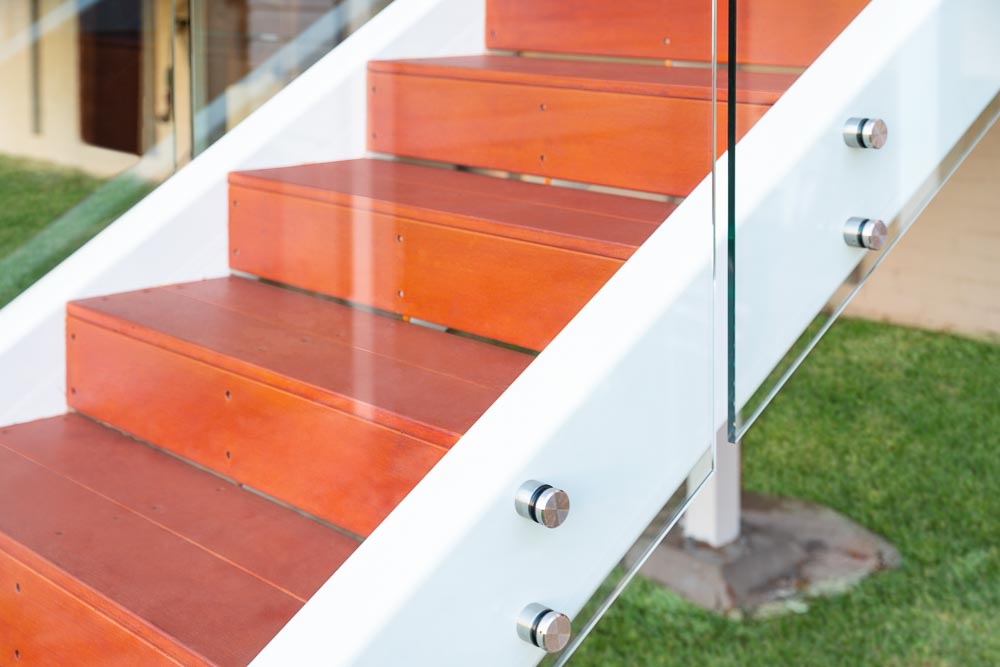
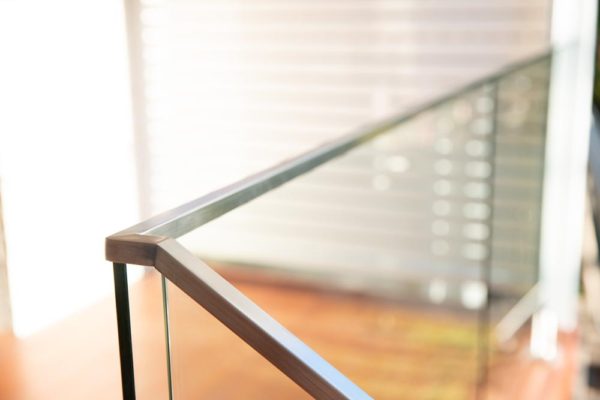
- Frameless glass balustrade with stainless steel top rail
- Custom fabricated, horizontal, powder coated aluminium screening to both ends
- Custom steel fabricated set of stairs from the deck down the natural ground level, with stair tread/risers covered in the ‘Inex’ decking
Outdoor Patio Cover:
- ‘Skillion’ patio cover falling to the backyard away from the house
- Fixed above existing roof line
- Colorbond roofing sheets over internal steel framing as required
- Ceiling lined, set & painted (gives that internal ‘Gyprock’ ceiling feel)
Other bits & pieces:
- Engineered steel beam
- Horizontal slatted, powder coated aluminium screens to each end
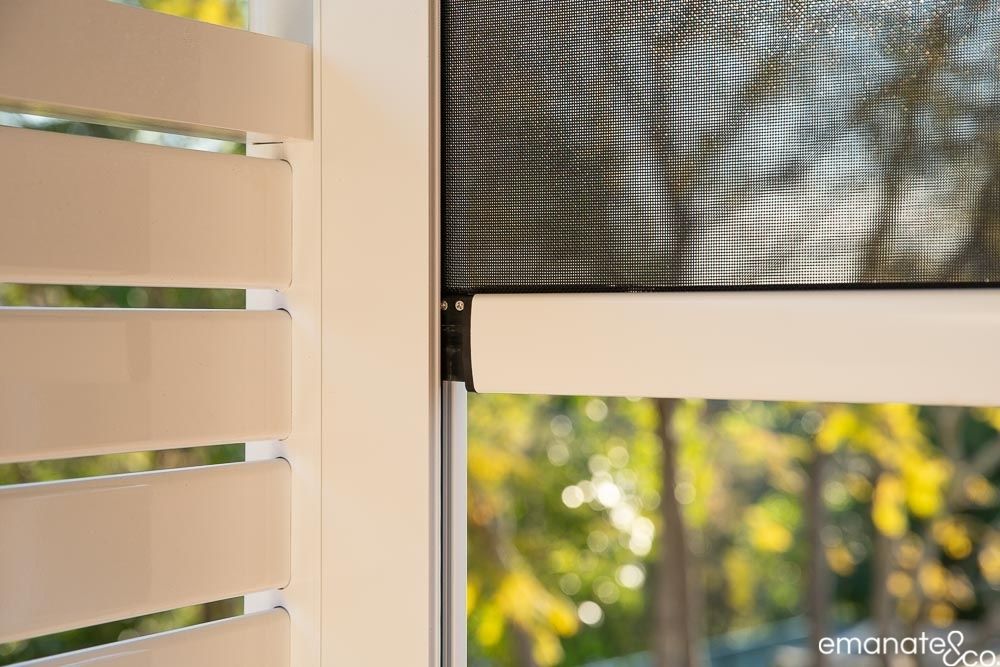
- Custom outdoor blinds
Electrical:
- Series of LED downlights
- ‘Heatstrip’ Elegance external heaters flush mounted into the ceiling
- External ceiling fan
Cost:
Total project value $153,965.00 (GST Incl.) Plus local authority/council fees, outdoor blinds & easement encasement.
So overall, at the time nudging $200,000. NOTE: This is from 2018 – so a lot has changed since then (think COVID & time). As all of our work is individually tailored & designed, use this example as a rough guide only.

Get in touch”Love, love, love our new deck/outdoor living area. It is better than we envisaged
Craig; West Pymble